

close
Choose Your Site
Global
Social Media
Views: 0 Author: Site Editor Publish Time: 2026-05-01 Origin: Site


Procuring heavy machinery requires balancing significant capital expenditure against potential deferred maintenance risks. Prices typically range from $20,000 to over $400,000. Buyers must balance this upfront cost against hidden damages. A successful acquisition hinges on matching exact job site requirements to machine specifications. You must rigorously verify structural integrity and mechanical health. Overlooking hidden wear can turn a perceived bargain into a heavy liability.
This guide outlines an evidence-based inspection and evaluation framework. We help you assess equipment condition thoroughly. You will learn to verify high-cost mechanical wear zones step-by-step. We will also help you shortlist reliable machinery. You will discover actionable strategies to confidently purchase your next earthmoving asset.
Always match machine size, horsepower (typically 100–200 HP), and emissions compliance (e.g., Tier 4 Final) to your specific operational environment.
Prioritize dynamic load testing over static visual checks; a machine's maintenance history and cold-start performance outweigh the hour meter.
Focus inspections on high-replacement-cost areas: the circle alignment, the moldboard cutting edge (replace at 0.5 inches), and the articulation point.
Verify aftermarket parts availability with local dealers before committing to older or discontinued models.
Assess the trade-off between coverage and maneuverability carefully. Large models reduce passes on open highways. However, they suffer high fuel costs. Smaller models remain necessary for tight residential or landscaping work. You must select the footprint suited for your primary jobs.
Always verify regional emissions requirements before making a decision. Ensure the machine meets necessary standards. For instance, EPA Tier 4 Final compliance is strictly enforced in many regions. Failing this compliance check invites costly retrofitting. It might even result in strict site bans. You should evaluate your operational needs against the machine class chart below.
Equipment Size and Application Matrix | |||
Machine Class | Typical Horsepower | Blade Length | Ideal Application |
|---|---|---|---|
Compact / Small | 80 - 120 HP | 10 - 12 ft | Residential grading, tight corners |
Medium | 130 - 190 HP | 12 - 14 ft | County road maintenance, site prep |
Large / Mining | 200 - 500+ HP | 16 - 24 ft | Highway construction, mining haul roads |
The market is dominated by legacy OEMs like Caterpillar, John Deere, and Komatsu. Each brand offers different articulation designs. Some feature cab-forward articulation. Others utilize rear-cab articulation. Weight class distributions vary heavily among these brands. Selecting the right Used Grader manufacturer directly impacts your operator’s comfort and visibility.
You must also assess technology integration. Determine if the project requires legacy rigid frames. Alternatively, modern smart-grading technology might be necessary. Telematics and automated grade controls improve finish accuracy. Older models lack these digital integrations. Decide if upgrading an older rigid frame justifies the investment.
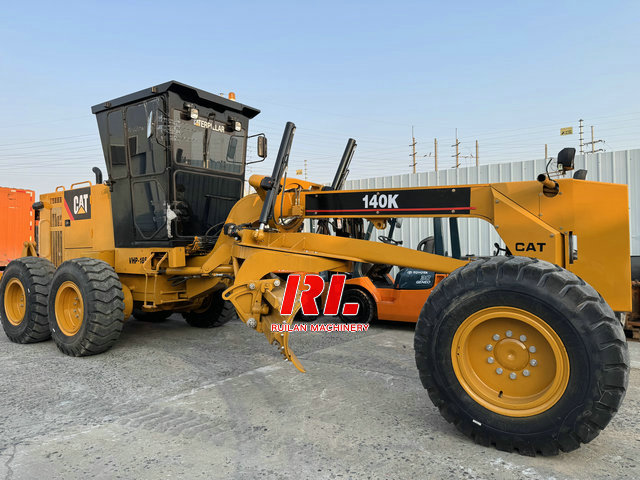
Check the circle for vertical play and misalignment. The presence of shims isn't inherently negative. Mechanics use shims to tighten wear gaps. However, this requires testing the circle through its full range of motion. You must ensure the pinion gear isn't binding. Any jittery movement points to damaged pinion teeth. Repairing a heavily damaged circle requires specialized labor.
Stand back and check the horizontal line of the machine. The articulation linkage must remain perfectly parallel. If the cab sits noticeably lower than the engine compartment, take note. It strongly indicates bent, loose, or severely worn articulation points. Replacing articulation pins involves heavy lifting and significant shop hours. Securing a structurally sound Used Grader relies on catching these sags early.
Inspect the cutting edge for uneven center wear. Operators refer to this as "cupping." It is caused by pushing abrasive rock and dirt. Inspect the blade thickness closely. If the edge is worn down to 0.5 inches (half an inch) or less, it must be replaced immediately. Delaying this routine swap causes severe issues.
Replacing a bolt-on cutting edge is simple routine maintenance. Failing to do so causes extreme financial implications. The wear will cut into the primary moldboard itself. A new cutting edge costs a fraction of a full moldboard replacement. Check the mounting bolts for excessive rust or shearing. Broken bolts weaken the entire blade structure during heavy pushing.
Chart: Moldboard Wear Economic Impact | ||
Remaining Edge Thickness | Condition Status | Action Required |
|---|---|---|
> 1.5 inches | Excellent | Routine monitoring |
0.6 to 1.4 inches | Moderate Wear | Order replacement parts soon |
≤ 0.5 inches | Critical / Cupped | Immediate bolt-on edge replacement |
Wear into Moldboard | Severe Damage | Replace entire moldboard assembly |
A heavy equipment frame handles immense torsional stress. Inspecting the main backbone and front axle for hairline cracks is mandatory. Pay close attention to areas subjected to heavy steering loads. Look closely at sections handling leaning loads during ditching operations. Fresh paint over stress points often hides serious structural flaws.
Frame Integrity & Stress Fractures: Clean off excess grease near the front axle. Shine a flashlight along the weld seams. Hairline cracks often start small but widen rapidly under load.
Evaluating "Fishplates" (Reinforcement Plates): The presence of welded steel fishplates means the frame has cracked. Mechanics weld these plates to repair the break. This is not an automatic dealbreaker. It requires expert verification. Ensure the welding was performed professionally to distribute stress. Poorly patched fatal flaws will fail again.
The Center Pivot Rule: Look for any signs of re-welding around the center pivot. Unauthorized fabrication in this zone is dangerous. Real-world operator experience dictates a strict rule here. A structurally compromised and patched center pivot is a high-risk liability. Walk away if you see crude, localized welding in this joint.
Common Mistake: Buyers often ignore rust. Surface rust is harmless. However, deep pitting near the tandem drives weakens the structural steel. Always tap suspicious rusty spots using a small hammer.
Static visual checks only reveal half the story. You must prioritize dynamic testing. Component lifecycle health dictates actual machine value.
The Cold Start Test: Insist on starting the machine from a completely cold state. Pre-warmed engines mask significant internal wear. A cold start reveals hidden engine blow-by. It exposes exhaust smoke issues. It also highlights initial transmission hesitation.
Hydraulic Cycling: Check the ground for leaks before moving the equipment. Cycle all hydraulics systematically. Lift the blade, articulate the frame, and lean the wheels. Listen for pump whining.
Load Testing: Conduct a brief test drive under load. Push a pile of dirt or gravel. The machine should not stall or bog down excessively. Transmission shifts must feel crisp.
Post-Drive Inspection: Inspect the hoses, cylinders, and engine compartment afterward. Fresh hydraulic fluid drips indicate blown seals. Fixing deep hydraulic leaks requires extensive labor.
Inspect for uneven tire wear across the tandem drives. Uneven tread often points to deeper alignment issues. It can indicate bent frames. It might also signal drivetrain malfunctions rather than just bad rubber. Replacing large industrial tires is expensive. Correcting a bent tandem drive multiplies that expense significantly.
Industry consensus favors a well-documented machine. A higher-hour machine carrying meticulous, documented maintenance logs is ideal. It easily outperforms a low-hour machine lacking service history. Greasing the joints daily extends component lifespans drastically. Ask the seller for complete service records. Analyze how often fluids were changed.
Best Practice: Before purchasing older models at a discount, execute a supply chain verification. Call local dealers to verify aftermarket parts availability. A cheap machine becomes a serious liability if replacement components are obsolete. Certain legacy models no longer receive OEM factory support. You must ensure you can source cutting edges and hydraulic seals locally.
If purchasing through heavy equipment auctions, act cautiously. Scrutinize third-party inspection reports. Do not bid blindly on aesthetic appearance. Thoroughly review the platform's return policies. Check their dispute windows regarding misstated conditions. Professional auction houses provide detailed component grading. Read these reports to confirm the circle and moldboard health match your visual assessment.
Purchasing reliable grading equipment requires looking past superficial aesthetics. You must evaluate structural health methodically. Verify strict wear tolerances, especially the 0.5-inch cutting edge rule. Establish a solid mechanical baseline through dynamic load testing. Do not rely solely on the hour meter to dictate equipment value. True condition always relies on maintenance habits.
Draft a standardized inspection checklist based on these seven tips. Prioritize machines featuring transparent, comprehensive maintenance histories. Schedule an in-person cold-start and load test before initiating any purchase. By executing these verification steps, you protect your capital investment. You will secure a high-performing asset ready for the demands of your job site.
A: Component lifecycle and maintenance history matter more than strict hour limits. Well-maintained machines easily exceed 10,000+ hours. If the previous owner performed regular greasing and fluid changes, higher hours are perfectly acceptable. Always demand service logs rather than judging solely by the meter.
A: No, provided they were installed by a certified welder. Proper fishplates distribute stress safely away from a repaired crack. Poor, localized welds or messy fabrication jobs are the real red flags. Always have a qualified mechanic inspect the weld quality before purchasing.
A: Replace it at approximately 0.5 inches of remaining thickness. Waiting any longer risks irreversible damage to the much more expensive moldboard itself. Swapping a bolt-on edge is cheap routine maintenance. Repairing a severely ground-down moldboard requires intensive structural fabrication.

